
A dilapidated old barn shutter turns rustic, reclaimed wood coffee mug holder in this simple, customizable tutorial.


We are smack dab in the middle of week five of our two week kitchen renovation, and let’s just say I’m a little antsy to get it finished. We went with a mostly modern farmhouse chic theme, and I want to add a few rustic, vintage touches throughout to make it more homey and inviting. I have been looking for a coffee mug holder but couldn’t find one I loved. My husband cleared a bunch of reclaimed wood from our barn, and this old shutter was one of the pieces I salvaged from the garbage pile. It was way too big for my space and chock full of rusty nails, but with a little TLC, it cleaned up quite nicely. This is not an extremely detailed tutorial because, let’s face it, you’re probably not going to stumble upon the same dilapidated old shutter that I did. Hopefully, though, it will inspire you to create something great…tailored to your own taste…from your own garbage pile. Happy hunting!
How I made my rustic reclaimed wood coffee mug holder


To begin, I removed all of the rusty nails and used a pressure washer to clean the pieces.


After the wood had time to dry, I sawed the ends to fit its new home on the kitchen wall, sanded everything with a medium grit sandpaper block, and cleaned off the dust with a tack cloth.


Next, I stained all the pieces, front and back, with one heavy coat of gray wood stain, making sure to get down into the grain.


This is actually the backside of the shutter after it was stained, but you get the point. I reattached the pieces with wood screws and then created my design using PicMonkey, the best beginner’s image editing software in my opinion.
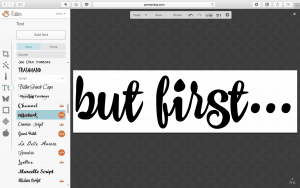

After saving my design, I uploaded it to Block Posters to blow it up and print it for free.

Then, I used graphite paper to transfer my image to the shutter. It’s super simple. Place the graphite paper behind your pattern. Trace over your pattern with a ballpoint pen, and just like that, you’ll have an outline on your wood.


I used a Sharpie Oil Based Paint Marker to fill in my design because I’m not much of a painter.

Once the paint dried, I attached coat hooks to the shutter to hold the coffee mugs.


It turned out to be perfect for our new kitchen. Vintage, rustic farmhouse style with just a touch of fun.
Don’t forget to pin this project for later!

