
DIY Vintage Farm Sign
My husband and I are in the midst of a kitchen remodel, and it has me in a DIY mood. I’ve been watching too many episodes of Fixer Upper, and I’ve become obsessed with old farmhouse-style kitchens and everything that goes along with them – old signs in particular. We have so much wood laying around that I decided to make my own DIY vintage farm sign.

When you’re thinking about a design for your vintage farm sign, pick something that speaks to you. My husband thought it would be a good idea to buy some chickens. They were supposed to be full-grown, laying-age chickens. Well, they didn’t lay any eggs. He tried everything in the world to get them to lay, but it turns out they were just too young. One day, they spontaneously started laying eggs, and suddenly we have plenty of them. Seventeen per day to be exact. They’re everywhere. Piles of them. Brown eggs. Pink and white and blue eggs. I’ve made fried eggs, scrambled eggs, quiches, frittatas, boiled eggs, egg salad… Please…someone take these eggs! Needless to say, I have eggs on the brain (and in particular, disposing of them), so they were my inspiration.
I read a ton of vintage farm sign tutorials before I started my project. My husband says I’m obsessive. I say…okay, maybe. Anyway, I didn’t follow any one tutorial in particular, but my method most closely resembles one which Candace at Vintage News Junkie used for her adorable DIY Barn Door Sign. (As of 11/12/19, website is no longer functional.)
Here’s what you need to do…
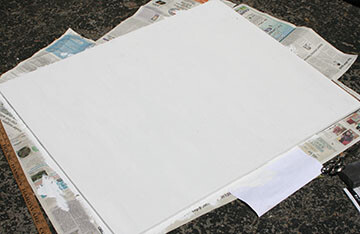
Choose your piece of wood and cut it if necessary. We have a huge pile of reclaimed wood that’s been sitting in the barn for who knows how many years just begging to be used. Old shutters, beautifully aged barn wood, you name it. I chose a plain ol’ piece of plywood for my first project in case I messed it up. I cut it down to 24″ x 36″.
Sand the wood if necessary and clean it with a tack cloth.

Use PicMonkey or Photoshop to lay out your design. PicMonkey is great for beginners, and the free version has plenty of features to get you started on your first project. Once I tried it for the first time, I was hooked.
Save your design and go to Block Posters where you can enlarge your design and print it off for free. Piece together the pages and tape it on the board.

Paint the wood. I used some white latex ceiling paint we had leftover from the playroom. I used two coats, but this is really up to you. You could even skip this step altogether, but I wanted my finished project to be less grainy.

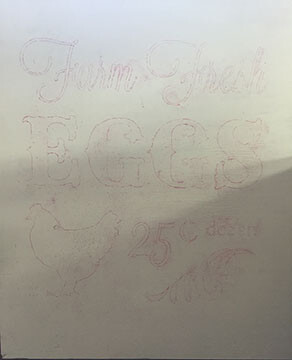
Use the chalk method to transfer your design to the board. I rubbed red chalk on the back of my poster, covering all the areas I wanted to transfer. Next time, I will use graphite paper instead of chalk. It worked fine, but I really hate the feel of chalk dust on my hands. Weird, I know.
After the back is nice and chalky, turn the poster back over and position your design where you want it, securing it with tape.
Use a ballpoint pen heavily trace your entire design, carefully pressing into the wood. This will transfer your design to your board.
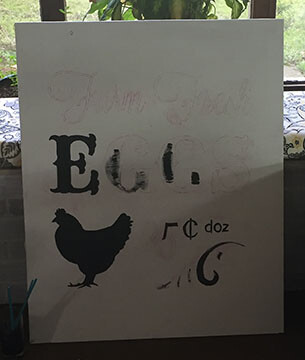
Use Sharpie paint markers to fill in the design. I started off with a paint brush, but I’m not a painter and they worked so much better with the detailed fonts I chose.
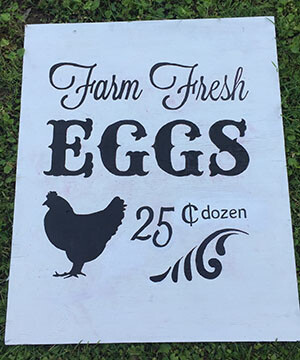
Dust off the chalk dust (without pressing it into the wood) and then sand it. I pressed harder in some areas to show the grain.
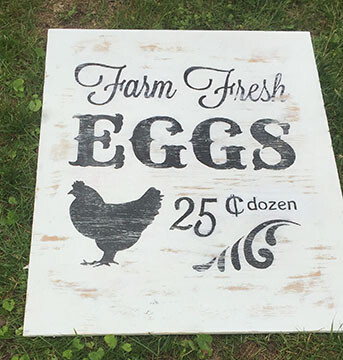
Lightly go over the sign with a dark antiquing wax using a lint-free cloth. Make sure to get down into the grain and not go too heavy to avoid streaks.

Materials
- piece of wood
- measuring tape
- saw, maybe
- 80-grit sandpaper (An electric sander will come in handy if you have one.)
- tack cloth
- paint brush
- white paint
- chalk or graphite paper
- tape
- Sharpie Paint Markers
- ballpoint pen
- lint free cloth
- antiquing wax
Directions
- Choose your piece of wood and cut it if necessary.
- Sand the wood if necessary and clean it with a tack cloth.
- Use PicMonkey or Photoshop to lay out your design.
- Save your design and go to Block Posters where you can enlarge your design and print it off for free.
- Piece together the pages and tape it on the board.
- Paint the wood.
- Use the chalk method to transfer your design to the board. See above for details.
- After the back is nice and chalky, turn the poster back over and position your design where you want it, securing it with tape.
- Use a ballpoint pen heavily trace your entire design, carefully pressing into the wood.
- Use Sharpie paint markers to fill in the design.
- Dust off the chalk dust (without pressing it into the wood) and then sand it.
- Lightly go over the sign with a dark antiquing wax using a lint-free cloth.
Don’t forget to Pin it for later!
DIY at your own risk. These are my suggestions and the method that worked for me. Please use caution with tools and chemicals and get professional help if you are not comfortable following any of these steps on your own. Using any of the products or methods that I have suggested is at your own risk. Have fun!
I accept payment for recommending certain products and services. These items or services may or may not be specified as being paid or sponsored content. All opinions expressed are my own.
This blog does not contain any content which might present a conflict of interest.

Would you happen to have your design for sale as a download? Lol it’s perfect for what im looking for! Love the sign and your design
Send me your email address at [email protected] and I’ll just send you the original file if I can find it! ☺️